These sourdough bread bowls have an amazing sourdough flavor, crusty outside and chewy inside. Their perfect texture make the BEST bread bowl for soup.
How to Make Sourdough Bread Bowls
If you haven’t ever made sourdough bread, first go to this post and learn how to make a basic sourdough artisan loaf. The big difference with making bread bowls is that you won’t bake these in a dutch oven. You technically can bake them in a dutch oven, it will just depend on how many you are making. You will have to bake them in batches because only 2 will fit at a time in a standard size dutch oven.
The method that I used for these will still give you a crusty outside, so never fear! So let’s get down to making these bread bowls:
Step 1: Mix your sourdough together in a bowl and follow the rest, pull and stretch, bulk rise steps. (See recipe below for detailed steps on this)
Step 2: After the bulk rise, divide your dough into 6 pieces. They should each weight around 200g or 7 ounces. If you want to make smaller or bigger bread bowls, you definitely can! Just divide your dough into more or less pieces.
Step 3: Shape each piece of dough into a round ball. To do this, first lightly dust your counter with flour. You are now going to fold the dough from all the corners into itself. Start by folding the bottom of the circle up to the middle. Then, fold the left side up and over toward the right, the right side up and over toward the left. Finally, fold the top down to about the middle. Flip your dough over, and put both hands over the dough so your thumbs are close to each other and your hands and fingers are wrapped around the side of the dough. Move your hands together in a circular motion, pushing the dough with one hand toward the other as it’s tightened between your hand and the counter. Prepear a baking sheet with parchment paper, a silicone mat or cooking spray.
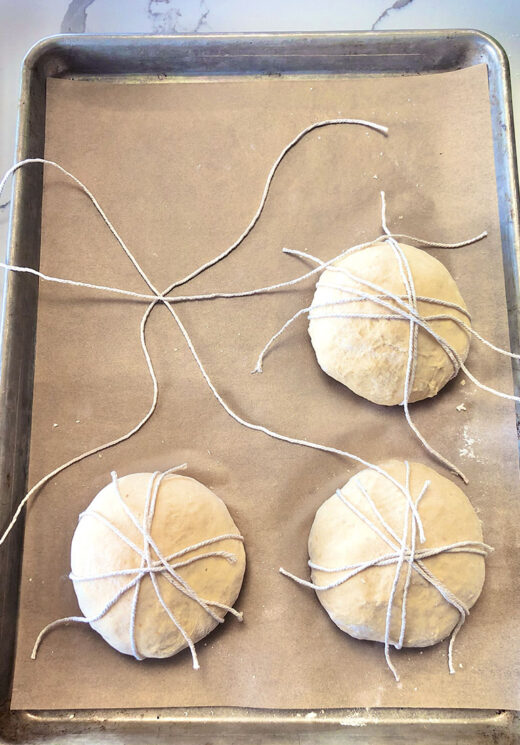
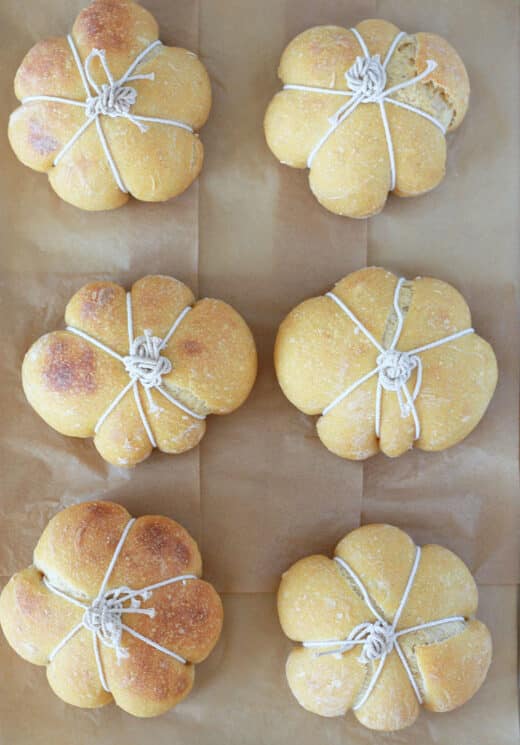
Step 4: Once your dough is shaped into balls, you will need to cut your twine. I recommend cooking twine because it is oven safe. This is a great brand to use. You will want to cut your twine long enough that it can fit around your dough ball and have the ability to be loosely tied at the top. I cut mine about 14″. Lay 3 cut pieces of twine crisscross in the spot you want to put your dough ball.
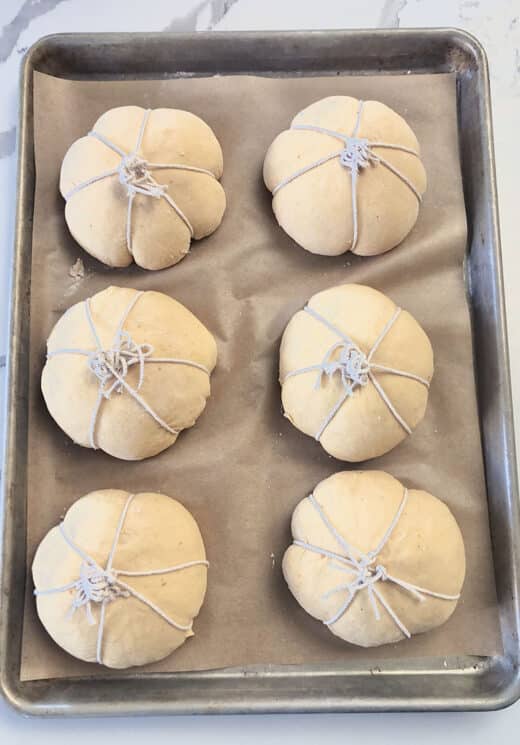
Once you have all of your dough balls on the trays, tie the pieces of twine loosely together on each dough ball creating a loose knot at the top of the dough. This is what will shape the dough into a pumpkin shape. You can adjust the twine as needed after it is tied. Tying is loosely allows for the dough to continue to rise, while creating the shape.
Step 5: Let your bread bowls rise and make sure you cover them with a damp cloth. I let them rise on the baking sheet and then cover with a cloth and tuck the edges of the cloth under the sheet.
Step 6: Baking your bread bowls. So there are a couple of ways to do this. Typically you bake sourdough in a dutch oven because the steam is trapped in and it gives you the crusty outside that everyone loves. If you aren’t going to bake these in a dutch oven, you will need to create your own steam.
- To do this, you will need a metal pan of some sort that is oven safe and you can pour a small amount of water in. Place the pan in the bottom of your oven or on the lowest rack before you preheat your oven.
- You can cook the bread on the baking sheet they rose on, or you can transfer them to a baking stone. If you have a baking stone that will fit all of your bread bowls, then that is the preferred method for sure! A baking stone can heat up much hotter than a baking sheet and will give you a better crust. If you are using a baking stone, put it in the oven before preheating at the same time you put your metal pan in.
- Once your bread bowls have risen, put them in the oven. Pour about 1/2 cup of water into the metal pan and then shut the door quick!
- After they are done baking, place them on a cooling rack and cut the twine when they are cool enough to touch.
Why Sourdough is the Best Type of Bread for a Bread Bowl
The texture of sourdough bread is more dense that your typical conventional yeast bread. This is ideal for a bread bowl, because you don’t want your soup to make a mushy mess of your bread bowl, or start leaking out. These sourdough bread bowls can hold up to any soup you can think of!
The crusty outside softens a bit when dunked into a delicious bowl of soup, but gives you that amazing texture variation that makes eating different foods so yummy.

Boost the Nutrition with Added Pumpkin
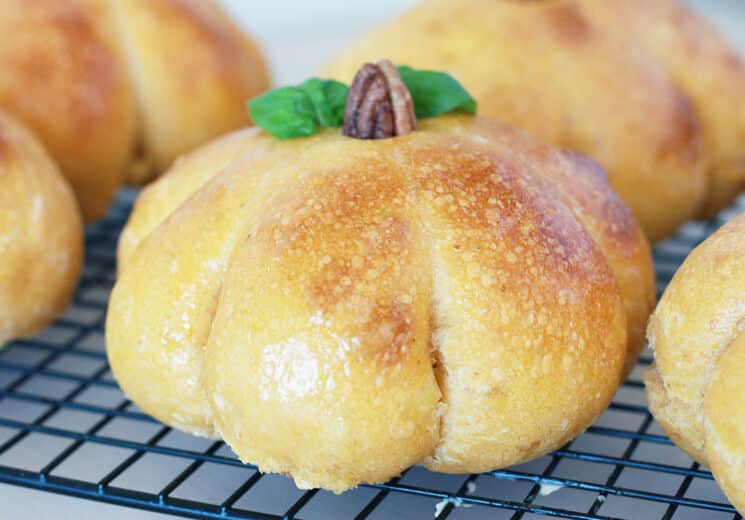
Adding pumpkin puree to your bread is a great way to boost nutrition without changing the flavor or texture of the bread. In this recipe, it turned the bread a slightly deeper orange color which was perfect for these pumpkin bread bowls!
Pumpkin is:
- High in Vitamin A and Beta Carotene
- High in fiber
- Good source of Vitamin C, Potassium, Vitamin B2, and Vitamin E.
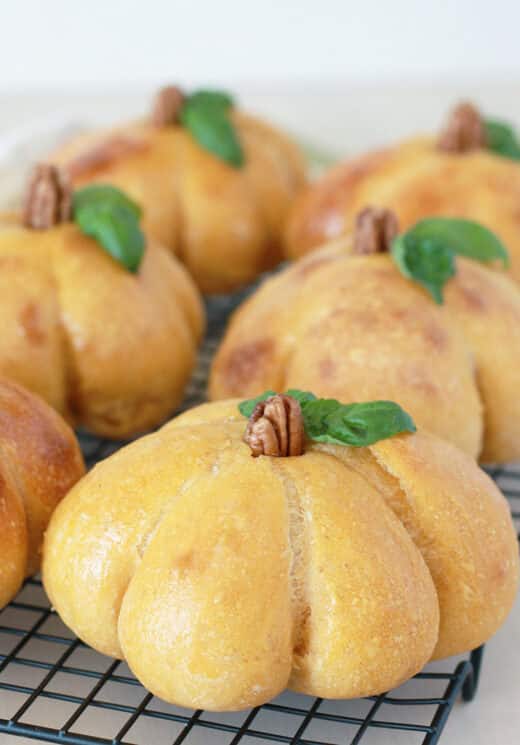
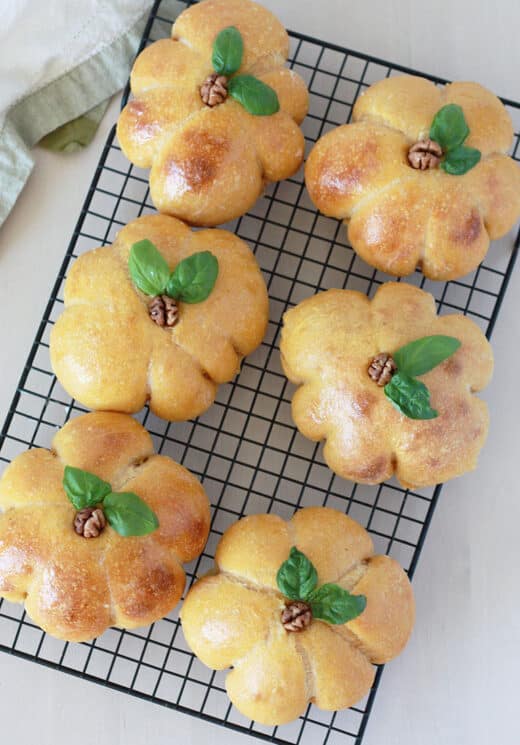
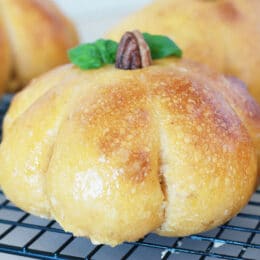
I created the stems with two pecan halves and the leaves are fresh basil. This is where you can get creative and have fun with different types of stems and leaves! I hope you enjoy these fun Sourdough Pumpkin Bread Bowls for your next Fall soup night!
Sourdough Pumpkin Bread Bowls
Ingredients
- 100 grams active sourdough starter ~1/4 cup
- 330 grams water ~ 1 1/3 cups
- 500 grams all-purpose flour ~4 1/2 cups
- 10 grams salt ~ 1 1/2 tsp
- 1/2 cup pumpkin puree
Instructions
- If you don't have a sourdough starter, this post will get you started!
- Stir your starter and water together in a large bowl. I like to use a danish dough whisk. Add the flour, salt and pumpkin puree. Mix until a stiff dough forms, then finish by hand to fully incorporate the flour. Cover with a damp towel or plastic wrap and let rest at room temperature for 30 minutes.
- After the dough has rested, you are going to fold and stretch the dough to strengthen the gluten and incorporate more air into your dough. Grab a piece of the dough and stretch it up and then fold it over. Slightly turn the bowl and repeat until you have stretched and folded all sides of your dough.
- Cover the bowl with a damp cloth or plastic wrap and let rise for about 10-12 hours. (bulk rise) I typically let mine rise for 12 hours. Letting it rise overnight is a great option. You will know that the dough is ready when it no longer looks dense and has doubled in size.
- After the bulk rise, remove the dough onto a lightly floured surface. Cut the dough into 6 even pieces that weigh 7 ounces (200g) each.
- To shape the dough into a balls, fold the dough over toward the center. Give it a turn and fold over the next section. Repeat until you have come full circle. Flip the dough over and with your hands on bowl sides of the dough, rotate in a circular motion putting a slight pressure towards the bottom.
- You can bake either on a baking sheet or a baking stone. If you are using a baking sheet, cover with parchment. The next step is to cut your twine. I recommend cooking twine because it is oven safe. You will want to cut your twine long enough that it can fit around your dough ball and have the ability to be loosely tied at the top. I cut mine about 14". Lay 3 cut pieces of twine crisscross in the spot you want to put your dough ball.
- Once you have all of your twine cut and layed, place your dough balls in the middle of the twine pieces. Tie the pieces of twine loosely together on each dough ball creating a loose knot at the top of the dough. This is what will shape the dough into a pumpkin shape. You can adjust the twine as needed after it is tied. Tying is loosely allows for the dough to continue to rise, while creating the shape.
- Let your bread bowls rise for 30-45 minutes. Make sure you cover them with a damp cloth or a pieces of plastic wrap sprayed with cooking spray. The dough is ready to bake when it looks puffy and has risen slightly.
- Preheat your oven to 425° F. There are a couple of different methods to bake your bread bowls. You will need to create steam with either method. To do this, you will need a metal pan of some sort that is oven safe and you can pour a small amount of water in. Place the pan in the bottom of your oven or on the lowest rack before you preheat your oven.
- Baking Sheet: You can cook the bread on the baking sheet they rose on. This method won't give you as crusty of crust, but still works great! Remove the cloth or plastic wrap and place the entire pan in the oven. Pour about 1/2 cup of water into the metal pan and then shut the door quick! Bake for 25-35 minutes at 425 °F depending on how crusty you like the outside. After they are done baking, place them on a cooling rack and cut the twine when they are cool enough to touch.
- Baking Stone: If you have a baking stone that will fit all of your bread bowls, then that is the preferred method for sure! A baking stone can heat up much hotter than a baking sheet and will give you a better crust. If you are using a baking stone, put it in the oven before preheating at the same time you put your metal pan in. Once your bread bowls have risen, transfer them to the preheated baking stone. Pour about 1/2 cup of water into the metal pan and then shut the door quick! Bake for 25-35 minutes at 425° F depending on how crusty you like the outside. After they are done baking, place them on a cooling rack and cut the twine when they are cool enough to touch.
- Brush the tops with butter. You can make a stem by putting two pecans together and placing them in the middle of each pumpkin. To cut the tops, angle a sharp knife inward and cut a circle to create a bowl. Serve with your favorite soup!