Want healthy meals your kids will love?

Honey Whole Wheat Bread Recipe

39 Comments

If you can bake cookies, you can bake bread. You don’t need a bread machine, a rolling pin or a wheat grinder. You don’t even have to get your hands messy! Baking bread is so much easier than you might think, and this post will tell you exactly how to get that first loaf in the oven.

The majority of conventional breads contain 20+ ingredients including preservatives and dough conditioners. This simple recipe for Organic Honey Whole Wheat Bread contains just 6 ingredients and requires a mere 10 minutes of hands-on time. Making the switch to homemade bread is an easy way to eliminate unnecessary chemicals and fillers from your family’s diet (and your kitchen will smell so wonderful on baking days!).

To get started, gather the following equipment:

And now, to mix!

First, combine 2 C hot water, 1/3 C grapeseed oil, 1/2 C honey and one egg in a Kitchen Aid (or similar) stand mixer. Mix well with the paddle or whisk attachment. (Note: if you want to eliminate egg from the recipe simply increase the oil to 1/2 C).

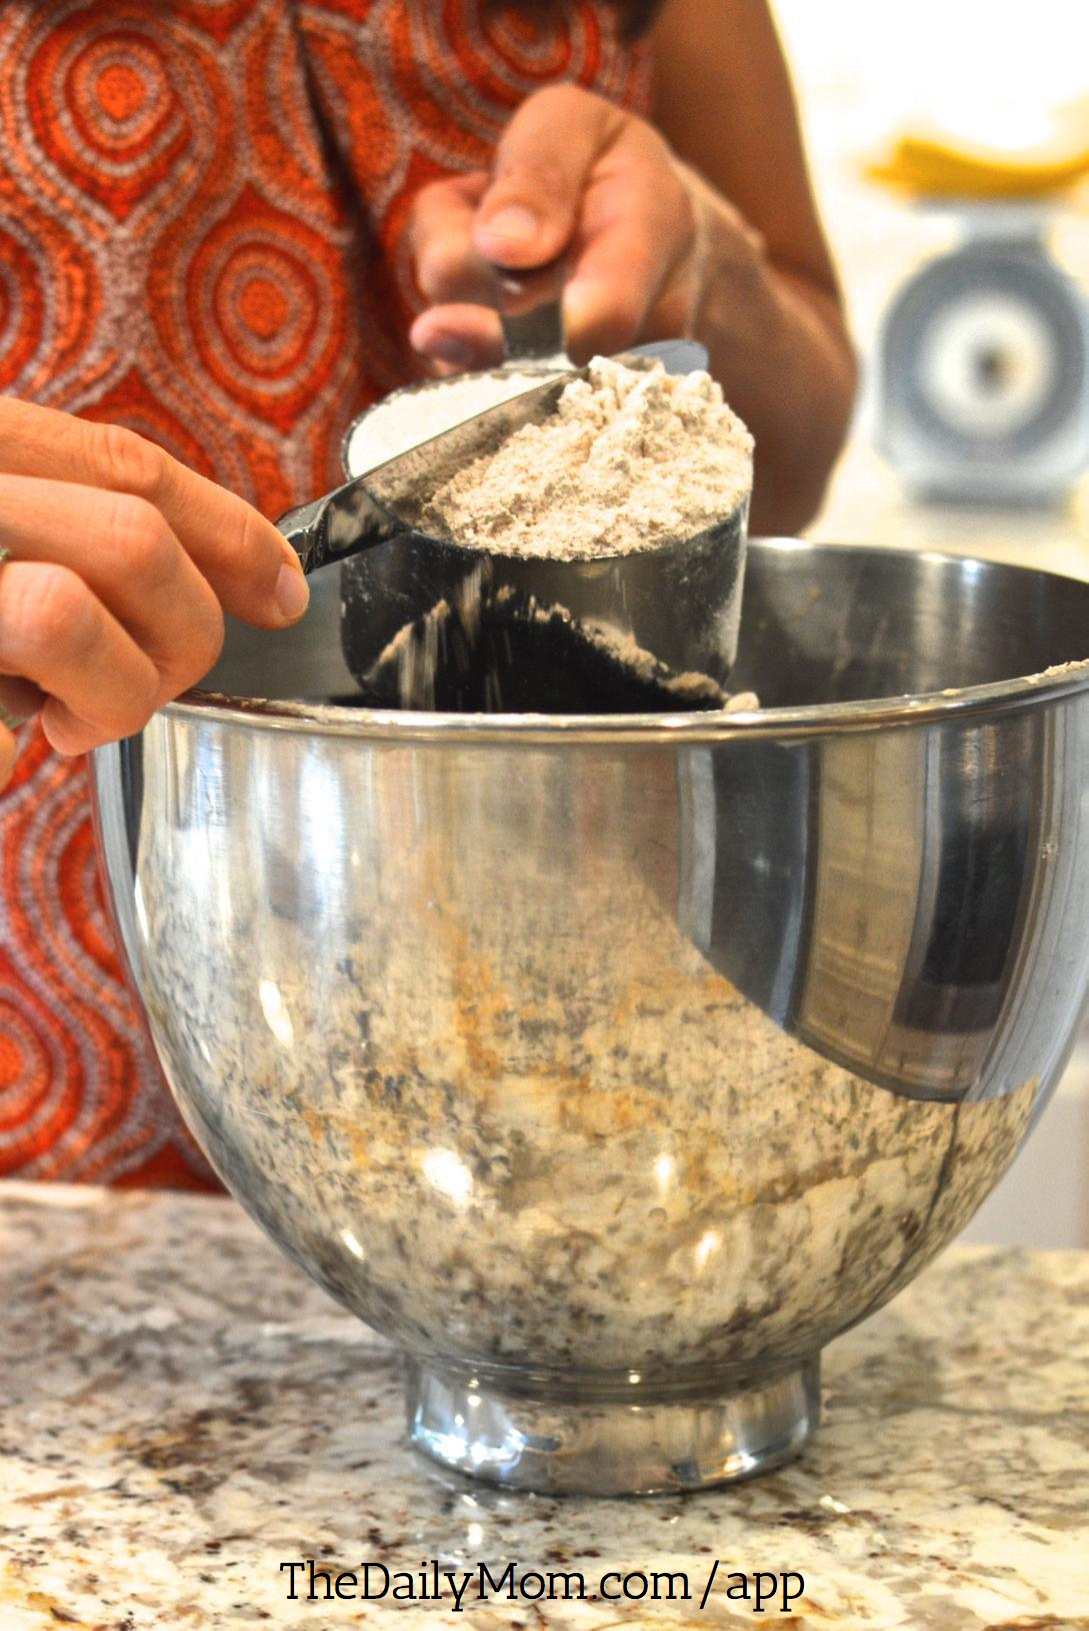
To the liquid ingredients, add 3 1/2 teaspoons fast-acting yeast, 2 teaspoons salt, and 3 cups flour (King Arthur Organic 100% Whole Wheat Flour is a good option).

Tip: Don’t shake your flour container or shimmy the measuring cup; doing so causes the flour to settle and you’ll end up with more flour than the recipe calls for. Instead, gently scoop the flour from its container, then use the flat edge of a knife for a clean measure.

Organic Honey Whole Wheat Bread. This simple recipe contains just 6 ingredients and requires a mere 10 minutes of hands-on time.

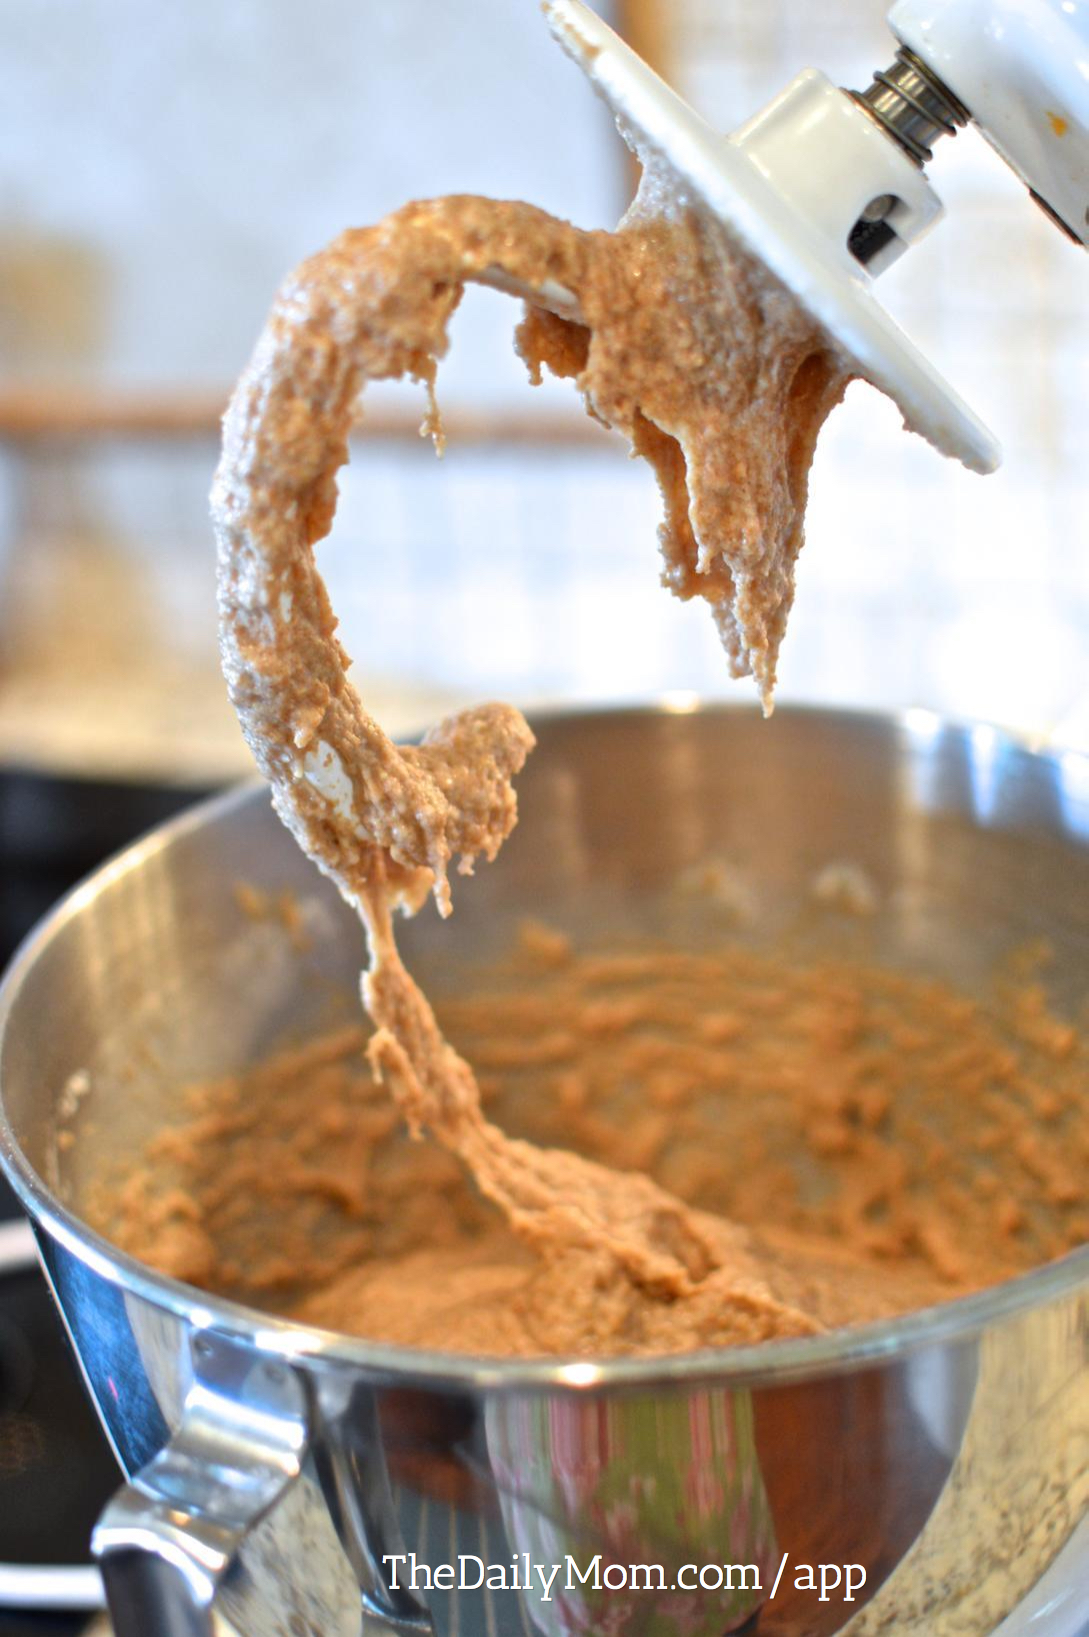
Next, remove the paddle attachment and connect the kneading hook. Add the remaining 2 cups flour. Set the mixer to medium-low and let it spin for 10 minutes. Your dough will be thicker than cake batter but not quite as thick as cookie dough.

Organic Honey Whole Wheat Bread. This simple recipe contains just 6 ingredients and requires a mere 10 minutes of hands-on time.

Divide the dough into two even parts; place each into its own greased loaf pan. Let the bread rise on the counter for 30 minutes. It’s not necessary to cover the dough (unless you have little taste-testers who might try to snitch!).

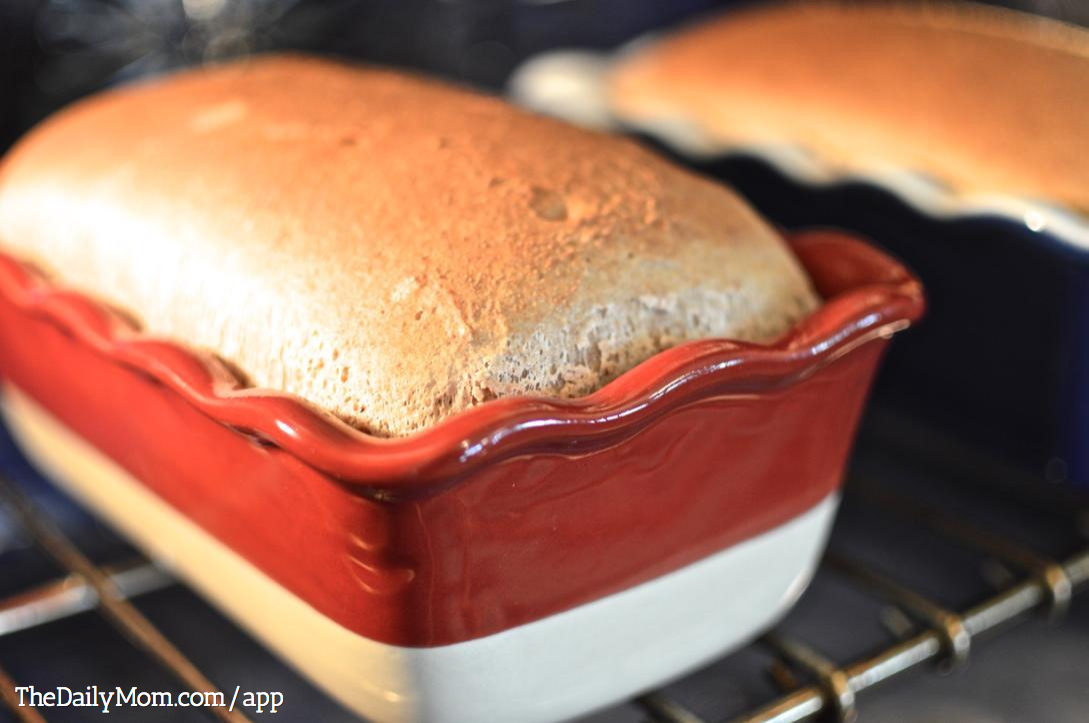
Once the dough has doubled in size, place the pans into a 350 degree, preheated oven. (The loaves can bake side-by-side in one oven.) Set the timer for 31 minutes (yes, 31!).

Organic Honey Whole Wheat Bread. This simple recipe contains just 6 ingredients and requires a mere 10 minutes of hands-on time.

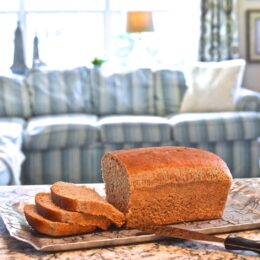
Remove the bread from the oven, let it cool for a bit, then use a thin, sharp knife to loosen each loaf from its pan. Gently turn the bread onto a cooling rack and slice when ready to serve.

Organic Honey Whole Wheat Bread. This simple recipe contains just 6 ingredients and requires a mere 10 minutes of hands-on time.

Since this bread doesn’t contain preservatives, you’ll want to keep it in the refrigerator in a  sealed bag and use it within about 5 days. If you need a reason to use it quickly, this bread makes fantastic French Toast!

Once you’ve mastered the basic whole wheat recipe, try modifying it to suit your tastes. I’ve had great success turning it into Cinnamon-Raisin Bread by adding cinnamon and raisins in the final step. Nuts and dried cranberries would be delicious additions, too. It’s also easy to make pull-apart rolls from this dough: place three small balls of dough into individually greased muffin tins and bake at 350 degrees until golden brown. If you’re feeling fancy, sprinkle the dough with garlic and sea salt before baking! Delish!

Kristen and her husband have four children; she is also the founder of The Daily Mom App, a news app designed specifically for busy moms.

Print Recipe Pin Recipe
4.5 from 31 votes

Honey Whole Wheat Bread

Prep Time15 minutes
Cook Time25 minutes
Rise Time20 minutes
Total Time1 hour
Course: bread
Cuisine: American
Servings: 2 loaves
Calories: 184kcal

Ingredients

  • 3 cups hot water not so hot that you can't touch it
  • 1 1/2 tablespoons dough enhancer
  • 3 tablespoons vital wheat gluten
  • 1/3 cup oil
  • 1/3 cup honey
  • 1 tablespoon sea salt
  • 1 1/2 tablespoons active dry yeast heaping tablespoon
  • 6-7 cups whole wheat flour see note if grinding your own*
  • 1 tablespoon butter

Instructions

  • Preheat oven to 170℉.
  • In the bowl of your stand mixer with the dough hook attachment, (I recommend using a Bosch), add the hot water, dough enhancer, vital wheat gluten, oil, honey, salt, and 3 cups of wheat flour. Mix on low for 30 seconds, and then add the yeast. Continue mixing on low speed.
  • Add remaining flour 1 cup at a time while continuing to mix the dough. You will know that you have enough flour when the sides of the bowl are clean from dough. Once you have all your flour in, turn the mixer to medium and let it mix for 8 minutes.
  • Spray 2 loaf pans with cooking spray. Pour the dough out onto a clean, floured surface. Put a little flour on your hands or spray with cooking spray because the dough will be slightly sticky and will likely stick to your hands if you don't.
  • Separate dough into 2 equal pieces. Shape each piece of dough into a rectangle with the top and sides tucked neatly underneath. Place into the loaf pans and put in your warm oven. Let the dough rise until it is about 2 inches above the rim of the loaf pan. This usually takes 15-25 minutes.
  • Leave the pans in the oven and increase the heat on the oven to 350℉. Bake for 25-35 minutes. Start the timer as soon as you increase the oven heat.
  • The bread is done when the tops are golden brown, as well as the bottom of the loaf. Remove from the oven and let the bread cool in the pan on a wire rack for 5 minutes. Carefully remove the bread from the pans and let them finish cooling on the rack. Spread the top of each loaf with a small amount of softened butter to keep the top of the loaf soft.
  • Let the bread cool for at least 10 minutes before slicing. Serve with butter, honey or jam and enjoy!
  • Slice and store extra bread in a gallon ziplock bag in the freezer for up to a month.

Notes

*Grinding Your Own Whole Wheat Flour
You will need 5-6 cups of wheat berries to make 6-7 cups whole wheat flour.   

Nutrition

Calories: 184kcal | Carbohydrates: 31g | Protein: 6g | Fat: 5g | Saturated Fat: 1g | Polyunsaturated Fat: 2g | Monounsaturated Fat: 3g | Trans Fat: 0.04g | Cholesterol: 2mg | Sodium: 357mg | Potassium: 138mg | Fiber: 4g | Sugar: 5g | Vitamin A: 21IU | Vitamin C: 0.03mg | Calcium: 16mg | Iron: 1mg
Keyword : Honey Whole Wheat Bread

www.superhealthykids.com

Natalie Monson

I'm a registered dietitian, mom of 4, avid lover of food and strong promoter of healthy habits. Here you will find lots of delicious recipes full of fruits and veggies, tips for getting your kids to eat better and become intuitive eaters and lots of resources for feeding your family.

Learn More about Natalie

Leave a Comment:
Did you make this recipe? Leave a review!

Your email address will not be published. Required fields are marked *

Recipe Rating


39 Comments

Hey by fast acting yeast do u mean instant yeast or dry active yeast…??..also I have dry active yeast available, wud there be a difference while substituting if its instant yeast in the recipe?..I do make quite a lot of breads but m not very optimistic about using only whole wheat, sneak some flour too..coz usually when I try full whole wheat I end up having a very dense layer which seems uncooked in the lower part of the loaf…any idea y this happens?

Yes this is a great recipe for those that have a super expensive counter clogging stand mixer! But I bake by hand with not even beaters. So I found the description of this pretty misleading…

Carly, I apologize – I didn’t see your comment when you posted it in June! I bake by hand a lot too, and you don’t need a “super expensive counter clogging stand mixer” for this recipe at all! In fact, I think it tastes even better when you knead it by hand. If you have a hand mixer that will help in the early stage of the process; mine can handle up to 3 cups of flour. From there, I hand stir the remaining flour in, and then hand knead for 10 minutes on a floured surface. If you try it, let me know how it goes!

Hi, Paula. I’ve never tried it in a bread machine, and I’m sorry to say I’m totally unfamiliar with how they work. If you try it, let me know how it goes!

Hi, Jessica! Olive oil definitely works – and if you’re feeling adventurous, add some rosemary and it’ll have a lovely flavor! I’ve never tried Avocado, but any relatively mild oil will work. Enjoy!

This seems like a wonderful recipe and I’m looking forward to trying it, but can it be halved or would it be ok to freeze one loaf? I don’t think my family can eat two loaves of bread in five days!

Hi, Emily! Yes – you can absolutely freeze this once you’ve baked it. I usually have a “baking day” and will do 10-12 loaves at a time. Once cooled, I freeze whatever we won’t use. You can even freeze it after you’ve sliced it. The only thing I’d suggest it to make sure you get as much air out of your freezer bag as possible, to avoid it drying out. Enjoy!

I can never seem to get bread to rise but this recipe was so easy to follow and turned out great. It was a huge hit with my kids. I was hoping it would turn out to more of a sandwich bread but I think it’s a tad too fluffy for that purpose but it will make a great side. It reminded me of those Hawaiian Rolls but without all the icky ingredients.

Hi,
I’m trying homemade bread for the first time. How hot should the
water be? And, without a mixer, how long should I mix/knead by hand?
Thank yku for the recipe!

Hi, Jeanne! The yeast will not activate if the water is TOO hot – so keep it under boiling temp to make sure it is able to do its job.

Without a mixer, I knead this recipe for 10 minutes. Bonus: you’re going to have some new arm muscles by morning. 🙂

Enjoy!

Wow Kristen, the recipe looks absolutely delicious!

For a long time I struggled with making bread dough and realized that the equipment I was using was the primary issue when it came to the texture of my bread. Having a high quality stand mixer with a dough hook really does make a huge difference at the end of the day. If you want quality bread, I would definitely recommend investing in a powerful stand mixer with a dough hook at the minimum.

Do you know if you have to add honey. Husband is diabetic so try to avoid sweetners but wasn’t sure if it was needed

We made this today – it’s delicious! It was my first time making bread – really excited about how quick and easy it is. Thanks for a great recipe!

Wow… What a fabulous recipe! The bread was lovely and light, my family polished it off really fast. Thanks for sharing.

5 stars
Made 1/2 of this recipe in the bread maker as a 1lb wholemeal loaf. It turned out amazing after substituting the oil for egg

This was delicious! Though I think my active dry yeast was a bit old and it did not rise as much before baking as I’d hoped and this was a shorter and denser loaf overall (but still quite tasty!). Could I substitute instant yeast? My stash of that is much larger and should be good through summer…

5 stars
Amazing!!! I tried this recipe today. Made half in loaf pan and other half used it for dinner rolls and cinnamon rolls. Turned out amazing. I wanted to a good whole wheat recipes and used to find end product rather dense. This is gonna be my go to recipe now.

4 stars
This is my regular bread now, but I had to make some tweaks, as it kept coming out way underbaked and kind of cakey:

– I use active dry yeast, so I combine the yeast with the other ingredients in step 1

– I let it sit for half an hour after step 3 to hydrate a bit

– I let it rise until doubled after step 4

– I bake for 40-45 minutes

With those tweaks it’s still super easy, and it comes out fluffier and doesn’t crumble when I make sandwiches with it.

5 stars
Hi! I am super not domestic and your website has inspired me to cook more. In fact, I swore I’d never bake bread in my life, but this recipe has turned me around. My two girls are gobbling this stuff up. I made it for a group of teenagers the other day and they were raving. Anyways, is there any way I can make it less crumbly. It’s so delicious as a sandwich but kind of falls apart. I’m afraid to go find another recipe because this one was so easy. Anyways- a flourishing fan.

So glad you liked it! There are a couple of reasons why your bread could’ve been crumbly. Some of the more common reasons are too much flour, not enough kneading, and over-proofing. You’ll want to stop adding flour when it’s still a bit sticky, and then knead until it’s not as sticky. Don’t skip on the kneading! And make sure you don’t let it over-proof or rise for too long. Good luck! Hope these tips help you in the future. 🙂

5 stars
This is my go-to bread recipe. Love that it’s 100% whole wheat and the flavour and consistency are outstanding. And SO easy. Have made it about 15-20 times now, following the recipe exactly as written, and it’s turned out great every single time.

5 stars
Really good! Was concerned at first with dough being on the wet side, looked again on post to see your dough looked like mine.
Had to bake a bit longer than posted.
Easy fun bread to make!

5 stars
My family LOVR, LOVE, LOVE this recipe! Yes i have made many loafs of this bread all by hand! Little if you knead 3 total time, let raise each time… OMG 😲…it comes out soooo soft! No need for any mixer at all!